
If you’re anything like my clients, you probably have an old wig sitting in your closet, looking a little tired, tangled, or not giving what it used to. But before you think about tossing it, let me tell you a secret—most wigs just need a little care to bounce back.
As a hairstylist, I’ve revived countless wigs, and today, I’m sharing five easy, at-home techniques you can use to restore your wig and make it look brand new again. Think of it as a mini spa day for your wig, and you’ll be amazed at the transformation.
1. Gentle Washing:
This is the first step to revival. Washing. Just like our hair, wigs collect dirt, sweat, and product buildup. The first step to a wig revival is a good, gentle wash. Forget harsh shampoos! I like to use a sulfate-free shampoo, the kind you’d use on delicate hair. Fill a basin with lukewarm water (hot water can damage the fibres) and add a small amount of shampoo. Submerge your wig and gently swish it around. Don’t rub or twist! Think of it like giving your wig a gentle bath. Rinse thoroughly with cool water until all the shampoo is removed.

2. Deep Conditioning:
After washing, conditioning is crucial. Most people don’t know that a conditioner restores moisture and softness, preventing that dry, brittle look. So, after washing, apply a good-quality wig conditioner (or a regular conditioner for delicate hair) from the mid-shaft to the ends. Let it sit for a few minutes (10–15 minutes), just like you would with your hair. Then, rinse thoroughly with cool water. This step will bring back that silky feel, trust me! Avoid applying conditioner to the wig’s roots or lace, as it can loosen the knots and cause shedding.
3. Detangling:
As a hairstylist, I’ve come to realise that winning the battle against tangled hair is by being patient, and more importantly, the way you detangle matters. The key here is to be patient and gentle. Tangles are one of the biggest reasons wigs start looking old. While your wig is still damp, use a wide-toothed comb or a wig brush to carefully detangle it. Start at the ends and work your way up. Don’t force it! If you encounter a stubborn tangle, spray a little leave-in conditioner or detangling spray. It makes the process much smoother and prevents damage.
4. Styling:
This is one of my favourite parts. I love to style my wigs in different ways, and you can too. Once your wig is detangled and mostly dry, you can style it. Want volume? Use rollers or a blow dryer with a round brush. Change the parting or trim the ends for a fresh look. If your wig is heat-resistant, use low heat to curl or straighten. For heatless styling, braid the wig while damp and let it air dry for beautiful waves. A little bit of styling product, like a light hairspray or serum, can help keep your style in place. Remember, less is more!
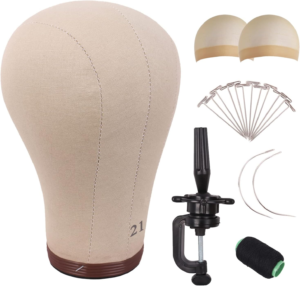
5. Proper Storage:
Finally, proper storage is essential for extending your wig’s lifespan. Don’t just toss it in a drawer! I recommend storing it on a wig stand or a mannequin head. This helps maintain its shape and prevents tangling. If you don’t have a wig stand, you can gently fold it and store it in a silk or satin bag. Avoid storing it in direct sunlight or in a hot, humid place, as this can damage the fibres. Taking care of your wig’s storage is like investing in its longevity.
Revamping an old wig doesn’t have to be complicated or expensive. Bring your wig back to life at home with these five simple techniques! And if you need the right products and tools, you can find them in our online or walk-in store.